
Installing New Duct Work in an Old Portersville, CA Home: An Overview
As the sun rises over the quaint town of Porterville, California, a group of determined workers gears up for an unusual challenge - installing new ductwork in a historic old home.
The house, with its charming Victorian architecture and creaky wooden floors, is a testament to a bygone era. Yet, hidden within its walls is a modern-day dilemma: outdated ducts that struggle to keep up with the demands of modern heating and cooling systems.
If your home has this issue, what do you do? We can help.
Let's go through what you need to know about ductwork and air duct installation for your Old Porterville home
Assessment and Planning
Begin by doing an in-depth assessment of the existing HVAC system and ductwork in the home. This includes inspecting the condition of ducts, identifying any leaks or damage, and assessing the overall efficiency of the system.
You'll want to inspect your ductwork as the seasons change, to make sure no major issues have sprung up.
Do a cooling and heating load calculation for the home to determine the required capacity for the new ductwork and HVAC system. Consider factors such as the size of the home, insulation levels, number of windows, orientation, and local climate to accurately calculate the heating and cooling loads.
Based on the load calculation results, design a new duct system that meets the heating and cooling needs of the home. Consider the layout of the home, including the number of floors, rooms, and their respective sizes, when designing the ductwork layout.
Look At Possible Challenges
Installing new ductwork in an old home in Porterville, CA, comes with its set of challenges.
Older homes often have limited space in attics, crawl spaces, and walls where ductwork needs to be installed. Accessing these areas can be challenging, requiring creative solutions and sometimes structural modifications.
The structural integrity of older homes may be compromised, especially in areas where ducts need to pass through load-bearing walls or floors. Careful planning and reinforcement may be necessary to ensure structural stability.
Homes built before the 1980s may contain materials like asbestos and lead paint, which pose health hazards when disturbed. Special precautions and professional abatement may be needed during ductwork installation to ensure safety.
Consider Ducting Supplies
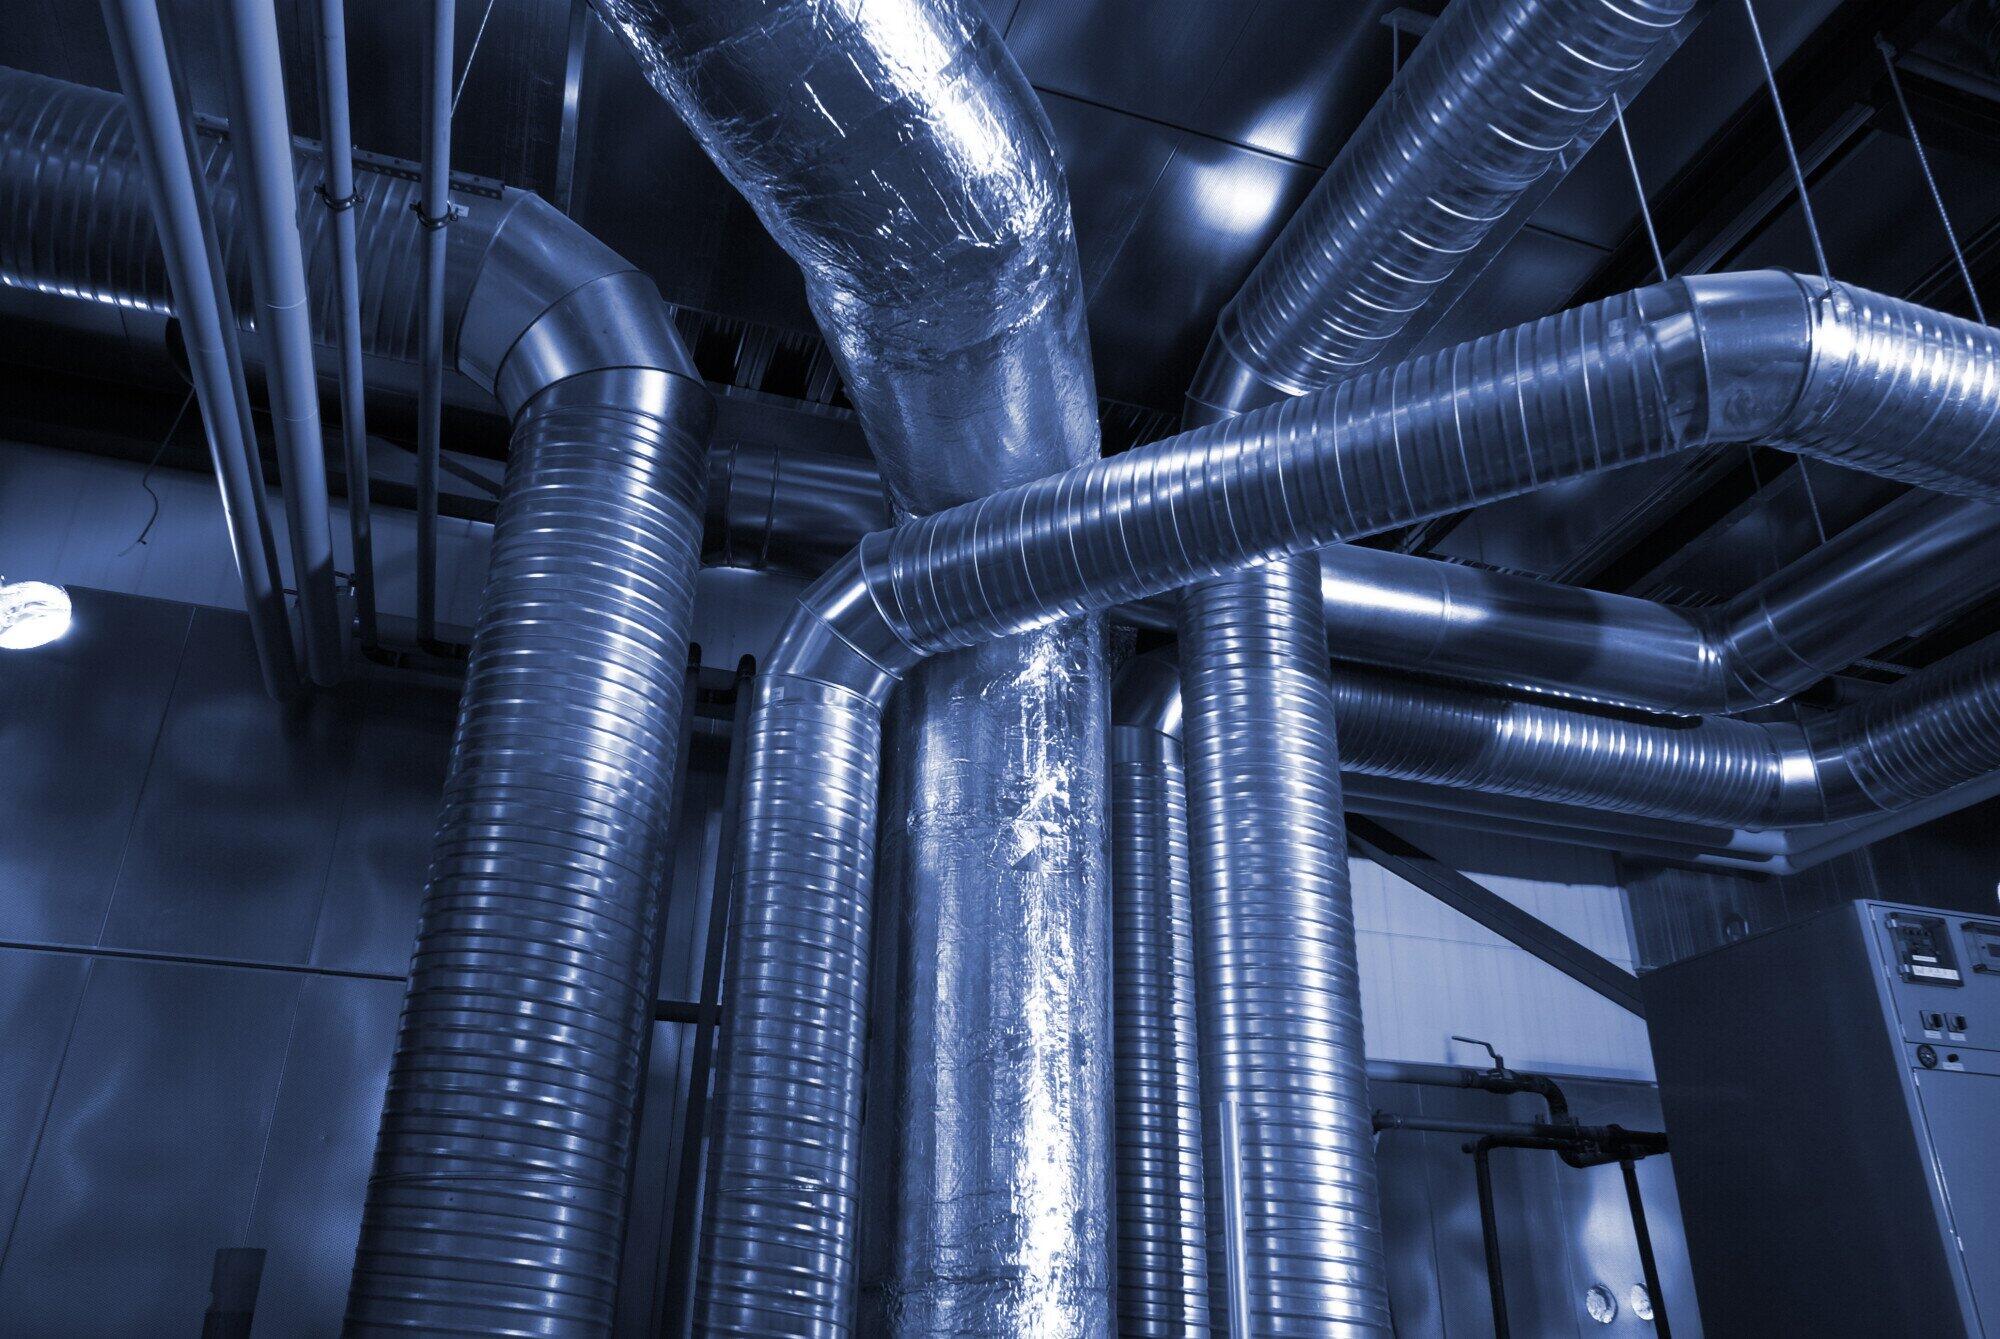
One crucial aspect is the choice of duct material. Galvanized steel is very durable and resists rust, making it suitable for both supply and return ducts.
Aluminum, being lightweight and corrosion-resistant, is ideal for navigating tight spaces and long runs. Flexible ducts, while versatile, should be used judiciously to avoid airflow restrictions if not installed correctly.
Insulation is another critical factor to prevent heat loss or gain, improve energy efficiency, and reduce condensation. Select insulation materials with appropriate R-values for Porterville's climate, such as fiberglass, foam board, or reflective barriers. Properly insulated ducts contribute significantly to the overall performance of the HVAC system.
Hire Air Duct Installation Services
If you're not a professional, or if your ductwork is complicated, you'll want to hire air duct installation services in Porterville.
These services bring expertise, experience, and the necessary equipment to ensure a successful project. Firstly, they conduct a comprehensive assessment of the existing HVAC system and ductwork to understand the scope of the installation.
This assessment includes looking at the condition of the current ducts, identifying any leaks or damage, and assessing the overall efficiency of the system. They can also help with any repairs you might need.
Professional installation services also handle the selection and procurement of ducting supplies, including choosing the right duct material (e.g., galvanized steel, aluminum, or flexible ducts), insulation, connectors, dampers, registers, and sealing materials. They ensure that all ducting supplies meet local building codes and safety standards.
During the installation process, these services focus on proper sealing techniques, insulation, and support to prevent air leaks, improve energy efficiency, and ensure the longevity of the ductwork. They use industry best practices and tools to achieve a high-quality installation that maximizes HVAC system performance.
Furthermore, hiring air duct installation services provides peace of mind regarding permits, regulations, and compliance with historical preservation requirements if applicable. They handle the necessary paperwork, coordinate with building authorities, and ensure that the installation meets all legal and safety standards.
Inspections and Testing
After the new ductwork is installed, perform airflow testing and balancing to ensure even distribution of conditioned air throughout the home. Use tools such as flow hoods, anemometers, and pressure gauges to measure airflow rates and pressures at different points in the duct system.
Adjust dampers, registers, and grilles as needed to achieve proper airflow and temperature balance in each room.
Conduct duct leakage testing to assess the integrity of the new ductwork and identify any leaks or air loss. Use duct leakage testing equipment, such as a duct blaster or smoke pencil, to pressurize the duct system and detect leaks.
Invest in Duct Work Maintenance for an Old House
Don't forget about maintenance. Proper maintenance helps preserve the integrity and efficiency of the newly installed ductwork. It prevents issues such as leaks, blockages, and airflow restrictions that can arise over time.
Regular maintenance can extend the lifespan of ductwork and HVAC components. It helps prevent premature wear and tear, corrosion, and other issues that could lead to costly repairs or replacements.
Clean and well-maintained ducts contribute to improved indoor air quality. They reduce the circulation of dust, allergens, and pollutants. This is especially beneficial for occupants with respiratory issues or allergies.
Maintaining ductwork reduces energy waste by minimizing air leaks and ensuring that conditioned air reaches its intended destination. This leads to lower energy bills and less of a severe environmental impact.
Invest in Old Porterville Duct Work Today
There's a lot to know about your old Porterville home's ductwork. Now that you know the outline, you should be able to begin the process of renovating an old home.
Are you ready to hire air duct installation services in Porterville, CA? Comfort Now has five-star reviews on various platforms due to our high level of customer success.
Contact us today.

Benefits of Investing in Water Purification Services in Visalia, CA
What's your typical first order of business when you wake up?
Chances are, you go to the bathroom, wash your face to eliminate the last traces of sleep, and drink a refreshing glass of water. If this has been your routine for a long time now, you may no longer even think about the quality of the water coming out of your taps.
According to experts, drinking water supplied to Californians is "largely safe to drink." While that's fantastic news, contamination may still occur as the water travels to your home.
Luckily, water purification services can help lower your risks of exposure to contaminated water and its hazards.
We'll tell you the benefits of investing in such services for your Visalia, CA, home, so read on.
Safer Drinking Water
The U.S. EPA regulates and sets drinking water quality standards throughout the country. It mandates states, local authorities, and suppliers to follow water treatment requirements.
The agency also enforces maximum limits on over 90 contaminants in drinking water. It does so because these components can make people and animals sick. They include the following:
- Biological, including pathogens like bacteria, viruses, protozoa, and parasites
- Chemicals, including bleach, human and animal drugs, metals, and pesticides
- Physical, including organic matter or sediments
- Radiological, including cesium, plutonium, and uranium
The problem is that treated water can still become contaminated after it leaves the treatment and distribution system.
How Water Contamination Happens After Treatment
This problem can occur when plumbing leaks in water supply lines meet malfunctioning sewer lines. The latter can leak sewage and wastewater, penetrating and contaminating the water supply. The same can happen when sewer systems overflow, often due to stormwater.
Contaminants like fertilizers and pesticides can also enter damaged water supply lines.
Water Purification to the Rescue
Since your plumbing system is a critical factor in post-treatment water contamination, it's vital to maintain it. Regular maintenance can help prevent supply, drain, and sewer lines from developing issues like leaks. You should also promptly address problems like chronic toilet clogs before they cause the drain and sewer system to fail.
Still, leaks that can cause water contamination may occur even with proper plumbing maintenance and use. These can be due to things outside your control, such as ground movement and tree root intrusion.
However, if you have a water purification system at home, you can worry less about those issues.
That's especially true if you invest in a reverse osmosis system. It can remove bacteria, viruses, and protozoa. It's also effective against chemicals like chloride, copper, chromium, lead, and pesticides.
Better-Tasting Water
Even if tap water is safe to drink, it can still taste weird or unpleasant due to its contents.
For example, tap water may taste metallic or bitter due to high amounts of iron, zinc, or manganese. It may also sometimes taste salty because of sodium, calcium, and magnesium. It can even taste sour if it's full of manganese or copper.
Either way, tap water that tastes weird can be so off-putting that you may want to avoid drinking it. That can lower your daily water intake, increasing your risk for dehydration.
The good news is that you can improve the taste of tap water with water filtration and purification systems. They can give you better-tasting water by removing the impurities that make it taste odd.
Nicer-Looking Water
The contents of your tap water may give it a discolored or cloudy appearance. For example, sediments can make it look yellowish, while iron and manganese can make it brownish.
You likely don't want to drink or cook with discolored water, and you won't have to if you invest in a water purifier.
Eliminate Funny Odors From Tap Water
Does your tap water smell like bleach? If so, that indicates it has undergone treatment with chlorine.
What if it smells earthy or musty? In this case, the culprit may be algae.
If your tap water smells like rotten eggs, it could be due to sulfur. This issue may occur if your water supply is from an underground source.
Chlorine, algae, and sulfur aren't harmful in tiny amounts. Still, their unpleasant odors can make you gag and want to avoid drinking or cooking with tap water.
Fortunately, high-quality water purification and filtration systems can also treat funny-smelling water. Since they remove the source of the odor, they can give you pure water that doesn't smell at all.
Reduce Risks of Skin Ailments
Water that contains bacteria, chlorine, chromium, and pesticides can affect skin health. The same goes for hard water, which contains high calcium, magnesium, and iron levels. Studies suggest hard water could worsen atopic dermatitis symptoms and raise the risk of eczema in kids.
So, before any of that happens to you or your loved ones, consider investing in water purification services. A local plumbing contractor can install a whole-house filtration or purification system in your home. Once installed, you can enjoy high-quality water in the kitchen, bathrooms, and laundry room.
Make Washing the Dishes and Laundry Easier
Contaminants and hard water reduce the effectiveness of cleaning products. They can also make soil and stain removal from dishes and clothes more difficult. Plus, the high mineral content of hard water can make clothes stiff and rough.
So, why not simplify your household cleaning chores with a water purification system? It can also help you save money, as you'll use less water and soap to wash your dishes and clothes.
Time to Enjoy the Benefits of Water Purification Services
From safer, better-tasting, and nicer-looking drinking water to lower risks of skin ailments, these are just some of the benefits purified water can bring.
So, as early as today, consider investing in the water purification services that our company, Comfort Now, specializes in. We've been around since 2011 and are proud to have served over 5,000 customers in Visalia, CA. Plus, you can count on not only our 24/7 plumbing services but also our HVAC solutions.
So, give us a call today to get your free service estimate! We'll also happily answer all your questions about our water purification systems.
The Importance of a Spring Ductwork Inspection for Efficient Cooling in Visalia, CA
Is spring your favorite season?
If so, you're not alone; not only do many Californians favor spring, but it's also the country's most popular season. From warmer weather and longer days to trees and flowers blooming again, these are just a few things that make spring popular.
However, spring's warmer days also mean you'll begin to rely more on your HVAC system to cool your home. Unfortunately, if your ducts have issues, your air conditioner's performance will suffer, too.
That's why it's wise to get a ductwork inspection in spring.
But why exactly is it crucial to inspect your ducts during this season? This guide discusses the perks and pros of hiring a professional to inspect your ducts, so read on.
Discover and Address Energy-Wasting Duct Problems
Leaky air ducts can lower your HVAC system's performance and efficiency by up to 20%. Incorrect installation, old age, and even pest infestations can cause or contribute to duct leakage.
Getting an HVAC check-up for your ducts allows you to discover such problems. A reliable technician will thoroughly inspect your ductwork to find issues such as:
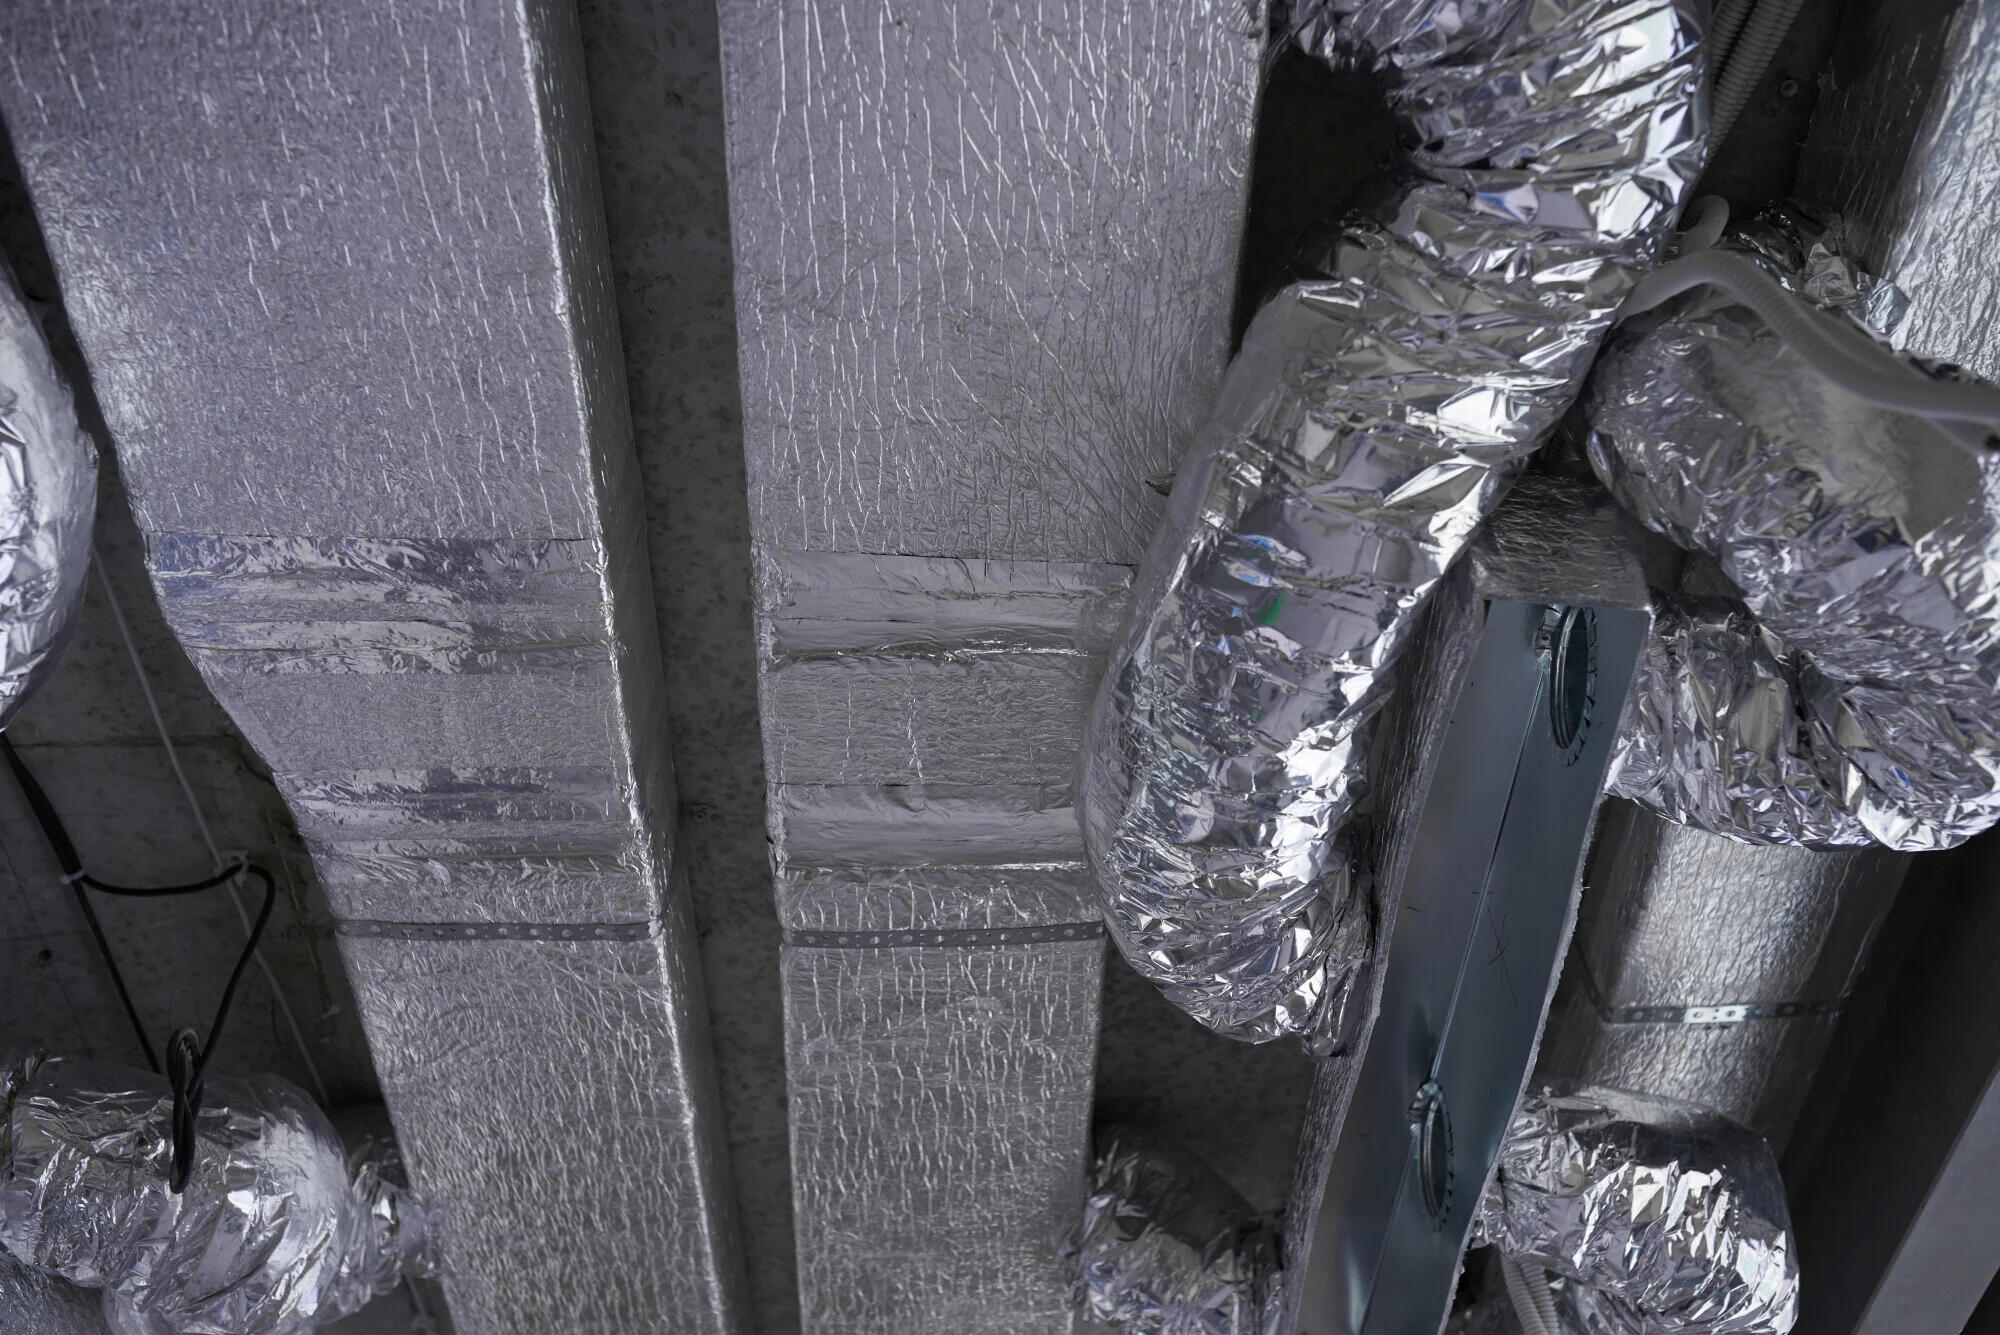
- Cracks, holes, gaps, or missing duct insulation
- Wet insulation materials
- Loose, disconnected, or damaged ducts
The technician will then suggest appropriate solutions based on their findings.
For example, if you have leaky ducts and missing insulation, the technician will recommend sealing and insulating them. But if there's significant damage, they may advise you to get your air ducts repaired.
Those solutions can help reduce thermal loss from the ducts, keep conditioned air from leaking out, and boost airflow. These benefits can help improve your HVAC system's efficiency, resulting in more energy savings.
Help Your HVAC System Last Longer
Dirty and leaky ducts can compromise airflow and affect your HVAC system's efficiency. For example, the air pollutants they circulate throughout your home can cause your filters to clog up faster. Clogged filters restrict airflow, forcing your HVAC system to work harder and use more energy.
Unfortunately, that problem causes higher energy bills and can shorten your system's lifespan.
So, before your energy bills go any higher and your HVAC experiences premature breakdowns, get a qualified technician to inspect your ducts. This way, they can determine if your ducts need cleaning or repairs. If they do, invest in these services to help make your HVAC system last longer and perform efficiently again.
Can Help Enhance Indoor Air Quality (IAQ)
IAQ pertains to how the air inside a building, such as a home, affects the health of occupants. It can be worse than outdoor air because it can be a mix of the following indoor pollutants:
- Volatile organic compounds (VOCs) from paints, aerosol sprays, disinfectants, etc.
- Indoor molds
- Pet and human dander
- Combustion byproducts of fuel-burning appliances like gas ovens and furnaces
Polluted outdoor air can also enter and accumulate in your home and HVAC ducts. This is a cause of concern, considering that out of 200 U.S. metropolitan areas, Visalia has the worst annual particle pollution. It's also the second worst for high ozone days and the fourth worst for 24-hour particle pollution.
How Spring Duct Inspection Can Help Boost IAQ
With a thorough inspection, a professional HVAC technician can determine how dirty your ducts are. The pro will also look for signs of duct damage, such as gaps and leaks, where air pollutants may enter and mix with conditioned air. Depending on their findings, they may suggest air duct cleaning, sanitization, and repairs.
Getting a pro to inspect and clean your air ducts in spring can be even more beneficial if you rely on a gas furnace for heating. As mentioned above, such appliances can lower IAQ because they emit byproducts (e.g., particle pollutants). So, your furnace use last winter could've made your air ducts dirty, which is why it makes sense to get them checked and cleaned in spring.
Your Ducts May Be Harboring Unwanted Guests
Visalia's mild climate allows pests like rodents to be active year-round. However, these critters have a good reason to invade your home in winter: to seek refuge in its warmth. Once inside, they look for a damp, dark spot where they're least likely to get disturbed.
Those characteristics describe the insides of ducts, so it's no wonder pests often love to hide in them. Then, come spring, when food sources become more abundant, they'll become more active again.
What Pests Can Do to Your Ducts and IAQ
Mice and rats may tear chunks of duct insulation to build their nests. They can also make the insulating materials wet by urinating on them. These problems reduce the efficiency and performance of your duct insulation materials.
That's bad enough, but it could be worse because pests, especially their droppings, can lower your IAQ. The foul odors of their excrement can mix with the cool air from your air conditioner.
Pest droppings may also contain germs that, when inhaled, can make you ill. An example is hantavirus from rodents, which the CDC says can be transmitted through the air.
Determine Possible Pest Infestations With Ductwork Inspection
A ductwork inspection by a reputable HVAC company is a reliable way to determine if you have (or had) pests in your ducts. Their technician will let you know if they find debris in the ductwork that looks like pest droppings. They'll also tell you if they see any live (or dead) pests.
From there, they'll recommend deep cleaning and sanitizing your air ducts. They'll also suggest you call a pest control company to deal with an ongoing infestation.
Schedule Your Spring Ductwork Inspection Today
A professional spring ductwork inspection helps determine if your ducts waste energy and contribute to poor IAQ. If they do, the expert can clean, sanitize, or repair them before the problems worsen.
If you're ready to get the ducts in your Visalia, CA, home inspected, Comfort Now's industry-certified HVAC technicians are here to help! We've been in business since 2011, and our money-back guarantee can help reassure you that you'll be happy with our services.
So, call us today! We'll gladly work on your ducts this spring and help prepare them for summer.
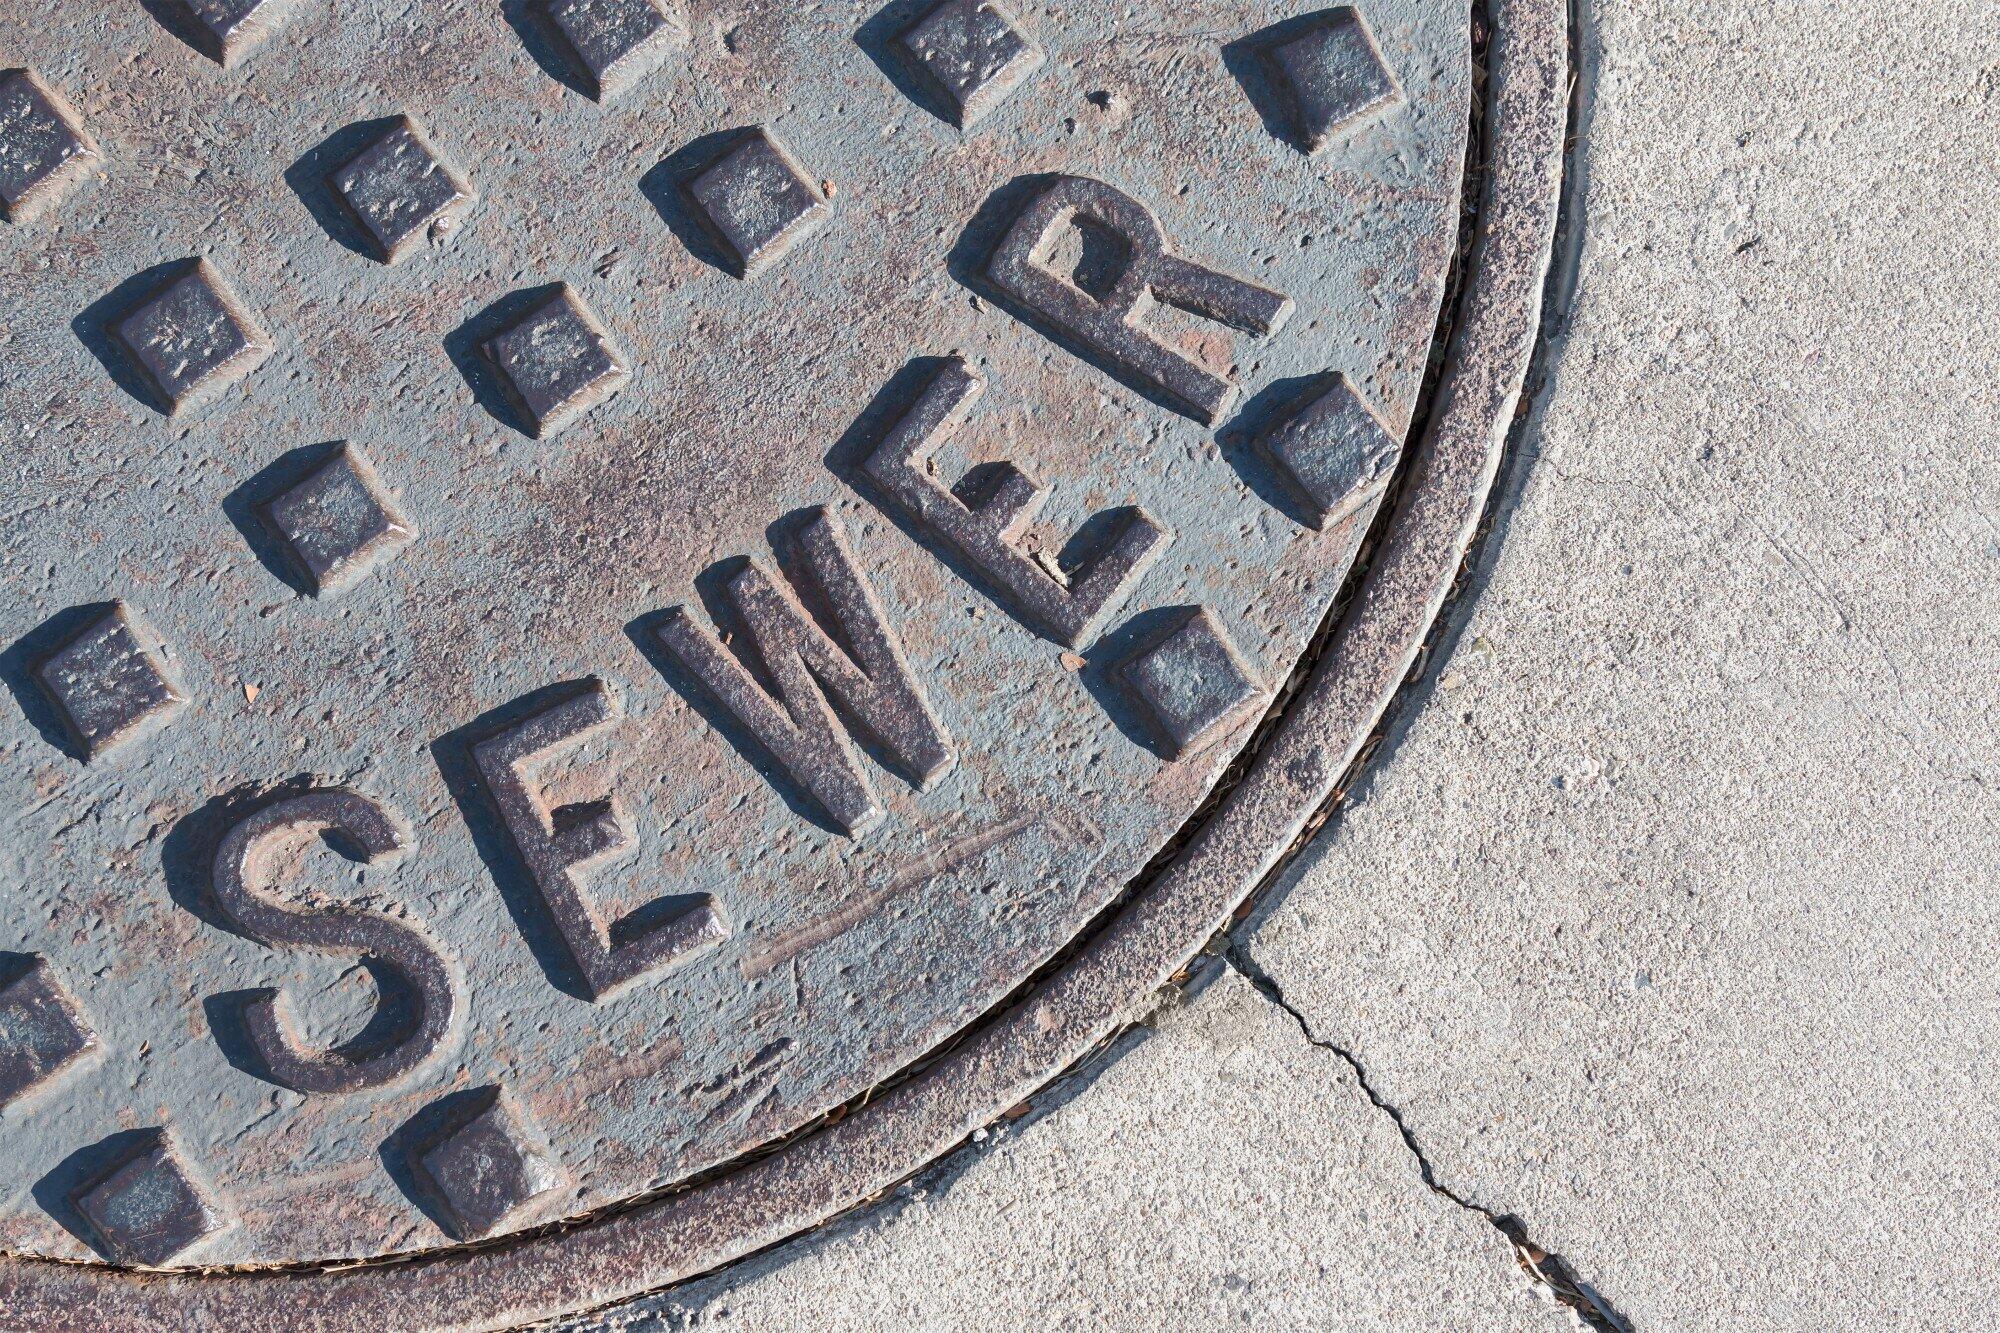
5 Signs Your Sewer Line Needs Repair and How to Address Them in Hanford, CA
A smoothly functioning sewer line is as essential to your home as a sturdy roof overhead. Ignoring signs of sewer line distress can lead to significant property damage and hefty repair bills.
Imagine a scenario where a neglected sewer line leads to a backup, flooding your home with waste. This not only requires expensive cleanup and repairs but also poses serious health risks to your family.
Keep reading to learn what to look for, including when it's time to repair a sewer line.
Slow Drains Throughout Your Home
If you notice that water consistently drains slowly in multiple fixtures around your home, it might be more than just a simple blockage. Slow drains can indicate a more significant issue with your sewer line, possibly due to obstructions or even tree root intrusion.
Common Causes of Blockages
Blockages in sewer lines can arise from everyday household waste products that find their way down the drains. Oils and fats poured down kitchen sinks can solidify in the pipes, trapping other debris and gradually forming clogs.
Hair accumulation in bathroom drains and non-flushable items like wipes and sanitary products contribute to these obstructions. These hamper water flow, leading to slow drainage throughout your home.
Before calling a local plumber for a plumbing repair, try using a plunger. If the problem persists, it's time to call in the professionals.
Unpleasant Odors
Foul odors emanating from your property are more than a minor inconvenience. They're a telltale sign that something is amiss with your sewer line. These unpleasant smells are often due to sewage gas escaping from cracks or breaks in the sewer system.
Beyond their offensive nature, these gases pose significant health risks. They can negatively impact your quality of life and property value.
Health Risks of Sewage Gas Exposure
Sewage gas is a mixture of various gases and compounds. Hydrogen sulfide is one of the primary components responsible for the characteristic rotten egg smell.
Exposure to sewage gas, even in small amounts, can cause symptoms such as headaches, dizziness, nausea, and eye irritation. Prolonged exposure to higher concentrations can lead to more severe health issues. These include respiratory problems and neurological damage.
Impact on Quality of Life and Property Value
The presence of persistent sewer odors can drastically affect your daily quality of life, making your home an unpleasant place to live. Outdoor gatherings, open windows, and even simple walks around the yard can become unbearable when accompanied by the constant reminder of sewage smells.
If the issue is not resolved, it can decrease the property's value. Potential buyers will likely be deterred by the smell alone, not to mention the underlying plumbing issues it indicates.
Unusual Sounds
Gurgling sounds from your toilets or drains can be alarming. These noises are often the result of a sewer line struggling to combat blockages. Air trapped in the lines due to obstructions can lead to these odd sounds.
Listening to your plumbing can help catch issues early, so consider a plumbing maintenance check if your home starts sounding like a symphony of gurgles and bubbles.
Patches of Lush Grass
When you notice a particular area of your lawn thriving with unusually lush and green grass, it might be tempting to attribute this to superior gardening skills. However, this can often signal a sewage leak beneath the surface.
Sewage leaks into the soil can significantly alter its chemical composition, acting as a fertilizer due to the nutrients and moisture present in the waste. This accelerates the growth of grass and plants in the affected area, creating a stark contrast with the rest of your lawn.
Environmental Impacts
Sewage leaks can have severe environmental consequences beyond the immediate visual impact on your lawn. The nutrients and pathogens present in sewage can contaminate local water sources. They pose a risk to wildlife and even affect drinking water quality in severe cases.
This contamination can lead to eutrophication in nearby ponds, lakes, and streams. This disrupts ecosystems and leads to algae blooms that deplete oxygen levels and harm aquatic life.
Pooled Water
Pooled water in your yard, especially when it hasn't rained recently, is a clear sign of trouble. While it may initially seem like a minor inconvenience, standing water can lead to more significant problems.
Stagnant water is a breeding ground for mosquitoes, which are not only a nuisance but also carriers of diseases such as West Nile virus and Zika virus.
Pooled water from plumbing leaks can also undermine the structural integrity of your home by saturating the soil and causing shifts in the foundation.
Detection Methods
Identifying a sewer leak early can prevent more serious problems. One method to detect unseen leaks is monitoring your water usage. An unexplained increase in water usage on your utility bill could indicate a leak.
Additionally, conducting regular inspections of your yard for signs of pooled water or unusually lush patches of grass can help spot issues before they escalate.
Addressing Sewer Line Issues in Hanford, CA
Recognizing these signs is the first step to mitigating potential damage to your home. The next step is contacting a local plumber or plumbing contractor specializing in sewer line repair.
In Hanford, CA, finding a plumbing service experienced with local conditions is crucial. They can offer services ranging from plumbing maintenance to complete sewer line replacement.
For homeowners in Hanford, staying ahead of sewer line issues is paramount. If you encounter any of the signs mentioned above, don't hesitate to contact a professional. Early intervention can prevent more significant problems down the line and ensure your home's plumbing system remains in top condition.
Don't Wait for a Plumbing Disaster to Repair a Sewer Line
Hanford residents, if you notice signs that you must repair a sewer line, it's time to act.
We understand the importance of maintaining a healthy plumbing system, especially in California's varying weather conditions. Whether you're dealing with water heater issues, considering water softeners, or need urgent sewer line repairs, our local plumbers are here to help.
Contact us at Comfort Now today for expert plumbing repair and maintenance services in Hanford, CA.

How to Tell if There Is a Slab Leak in Your Hanford, CA Home
You're relaxing in your home when you hear it: the sound of rushing water. You're not using your plumbing, so you jump up to find the source, but there are no obvious culprits. Your heart sinks as you realize what this might mean.
Slab leaks are a homeowner's worst nightmare. Unlike other issues, these nefarious leaks are hard to spot and even harder to control alone. Worse, if you don't catch one soon enough, you could end up spending thousands on structural repairs!
That's why knowing the common slab leak signs can be so crucial. By catching these plumbing leaks early, you can get fast repairs to preserve your home's structure. If you're not sure what to look for, read on for the most obvious warning signs.
High Water Bills
Water bills have been on the rise for a while, but this increase should be gradual. Though your water bills may fluctuate throughout the year, any unusual spikes should be a red flag.
If your bill has skyrocketed and you aren't sure why, there's likely a plumbing leak in your home. Because most serious leaks become obvious after you inspect common culprits in your kitchen or bathrooms, an unexplained leak may be an issue with your slab. When water is running 24 hours a day, you can bet your bills will suffer for it!
The cost of a slab leak can vary depending on the severity of the leak. However, even a minor leak costing just a few dollars more each month can cause serious damage over time.
Reduced Water Pressure
No one likes struggling with low water pressure, but this issue is more than a simple frustration. If your home's water pressure dips all of a sudden, all that water must be going somewhere.
When your slab starts to leak, you'll often have less water running through the pipes in your home. This may be more or less noticeable depending on how bad the leak is. Rule out common culprits behind low water pressure before seeking help for a slab leak.
Rushing Water
Sometimes, you can hear a slab leak long before you see the signs.
If you notice the sound of water running, even when you aren't using your plumbing at the moment, always investigate. Turn off water sources in your home, including water-guzzling appliances like the dishwasher or washing machine, and listen. If the rushing sounds don't stop, contact a plumber for help.
"Hot Spot" in the Floor
As you walk around your home, you probably don't think too much about the temperature of your floors. However, slab leaks can cause sudden and obvious "hot spots" that feel warmer than the rest of your flooring. The temperature change is most obvious on solid floors such as laminate or linoleum.
These warmer areas can happen when a slab leak is present in your hot water line. As water leaks, it heats your flooring in a single area.
Calling an expert plumbing contractor right away is crucial if you want to preserve your floors!
Warped, Wet, or Damaged Floors
If you're unlucky, a leak in your water lines will seep far enough to the surface that it affects your flooring.
Certain types of flooring are more prone to damage than others. Organic flooring materials (such as wood) will often start to bend, buckle, or darken sooner than synthetic floors. With linoleum and laminate flooring, the surface may begin to warp. You might also notice damp or even wet floors, especially with carpets.
Moldy, Mildewed, or Damp Odors
Foul scents are among the most common signs that you have plumbing problems, and that's true with slab leaks as well.
As water accumulates under your home, all the moisture gets trapped in place. Worse, it often infiltrates your flooring.
That moisture creates an open invitation for mildew and mold growth. These can create musty or damp smells in the areas most affected by the leak.
Mold spores spread fast, creeping through your flooring and into your walls. Even worse, this nuisance is awful for your household's health, causing a slew of common symptoms that wreak havoc on your respiratory system.
Rapid Plumbing Issues
Everyone needs a professional plumber now and then, but you shouldn't have to keep one on speed dial! If you're calling your local plumber for back-to-back appointments to address leaks, it should be a sign that something else is going on.
An expert plumbing contractor should realize that your slab is the hidden culprit, but you should know the warning signs if they miss them. Stopped-up tubs, toilet backups and clogs, and other plumbing issues that recur may indicate that water is seeping upward fast.
Cracks and Buckling
If your slab leak goes on for long enough without plumbing repair, it may start to affect the structure of your home.
As it gets into your flooring and even into your walls, you'll see signs of water damage in your home's materials. This may include cracked walls and buckling or sagging floors. You may also notice bubbling paint.
Pooling Water
If you notice water pooling on your bathroom floor when no one's taken a recent shower, take it as a warning sign. This is especially true if there's no sign of an indoor leak elsewhere.
Watch for water pooling outdoors as well. If you haven't had any rain in recent days, there's no reason why puddles should be forming in your backyard, especially in the areas nearest your home.
Know the Common Slab Leak Signs
No one wants to deal with the hassle and expense of a slab leak, but catching one early can save you a lot of headaches. By knowing the common slab leak signs, you'll be better poised to seek plumbing solutions sooner rather than later. Sometimes, fast action can save you hundreds or thousands!
If you've noticed any of the signs above, it's time to call the experts at Comfort Now. Our experienced plumbing contractors offer fast and reliable service throughout the Hanford, Visalia, and Porterville areas and beyond. To diagnose your issue and get speedy slab leak repairs, contact us today.
Clean Air in Porterville, CA: Why a Furnace Filter MERV Rating Matters
Car exhaust, smokestacks, and smog are likely some of the first things you picture when you hear the words "air pollution." However, what if we told you you're way more likely to experience pollution within the walls of your own home?
According to the EPA, concentrations of indoor pollutants can be 2-5 times higher than they are outdoors. Since we spend an average of 90% of our time inside, this can be terrible for our health!
That's where your filter comes in. Your furnace filter MERV rating tells you how well your system will capture airborne particles that pass through your home.
Unfortunately, the number scrawled on the side of the filter frame isn't always easy to understand. How do you know which rating is best for your air quality? Do you need a HEPA filter, too?
We've got you covered. Here's what you should know about choosing the right furnace filter for your home.
Basics of MERV Ratings
When you buy a filter, you'll see the MERV rating printed as a number on the side. If you can't find the rating, your filter likely has the lowest-quality MERV rating.
MERV stands for "Minimum Efficiency Reporting Value." Designed by the American Society of Heating, Refrigerating, and Air Conditioning Engineers (ASHRAE) back in the 80s, the rating system evaluates how well an air filter performs.
You'll find MERV filters with ratings that run from 1-20. Each numerical rating lists a minimum amount of particles that the filter must be able to capture.
Lower-rated filters capture fewer particles. Higher-rated filters capture more. Because of this, you might consider choosing your filter a no-brainer: why not pick a filter with the highest possible rating?
Not so fast!
The more particles a filter can capture, the more reduced your airflow becomes. With the highest-rated MERV filters, your system may struggle to circulate air. This can put a serious strain on your furnace.
In other words, finding the right filter is always about balancing particle capture against efficiency.
Furnace Filter MERV Rating Guide
Every home is different, and you might prefer a higher or lower MERV rating based on your household makeup. This quick guide can help you navigate the rating system:
1-5 MERV Rating
For most households, we don't recommend choosing a furnace filter with a MERV rating below 5.
These lower ratings don't block particles smaller than lint, sanding dust, and carpet fibers. In other words, they allow the bulk of other airborne contaminants to circulate in your home.
6-8 MERV Rating
In general, we recommend that most homeowners start with a MERV rating of 6-8.
These filters will block out common pollutants like dust, pollen, dust mites, and even certain kinds of mold spores. For the average residential home, this option is a great balance between indoor air quality, comfort, and furnace efficiency.
9-13 MERV Rating
If anyone in your household has respiratory conditions, a better filter may be ideal.
Choosing a furnace filter with a MERV rating of 9-13 can help reduce common allergy symptoms. It will also trap fine dust, pet dander, smog, and smaller mold spores at the cost of slightly lower furnace efficiency.
14+ MERV Rating
We don't recommend choosing a MERV filter above 13 for most Porterville homes. At these high levels, these filters become overkill.
Higher MERV filters are common in commercial buildings and hospitals. This is because they block airborne threats like smoke, bacteria, and even viruses like COVID-19. They're great for industrial equipment, but they're not ideal for your home furnace!
If you feel you need a higher-rated filter, speak to a reputable HVAC company about options and alternatives.
Additional Factors to Consider
Keep in mind that not all systems are capable of handling higher-rated MERV filters.
If you have an aging furnace, a filter of 13 or higher could cause serious damage over time. You may even overwork the system to the point of a breakdown.
Always check your owner's manual, which should list the maximum recommended MERV rating. If needed, talk to a heating service professional about upgrading your system or finding a MERV rating that will work for an older unit.
In addition, maintaining a clean air HVAC filter is even more important with moderate to high MERV ratings, no matter the age of your filter. As a higher-rated MERV filter collects more contaminants faster, the buildup of debris can strain your system.
To make airflow easier, check and change your filter at least once every 90 days, depending on your household makeup. Periodic cleaning of your system helps as well.
What About HEPA Filters?
To add to the complexity of choosing an air filter, there's another design standard you can opt into: HEPA filters.
HEPA stands for "high-efficiency particulate air." These filters always have a MERV rating of 17 or higher.
In addition, HEPA filters can remove up to 99.97% of all airborne particles larger than 0.3 microns. If you're concerned about your indoor air quality or anyone in your home has severe respiratory conditions, these filters are hard to beat.
It may be possible to find and buy a commercial-grade HEPA filter for your furnace, but you'll run into the same problems we've mentioned above. Because these filters are so good at catching contaminants, they also create high air resistance. This can be tough on your furnace.
For that reason, we recommend choosing a separate air purifier or vacuum cleaner with a HEPA filter. These systems trap airborne particles without reducing your system's energy efficiency.
Get More Out of Your Furnace Filter
Your filter is a crucial part of your furnace, shielding your system from debris while improving your air quality. That's why it's so important to find the right furnace filter MERV rating! Use the tips above to find a filter that balances your system's and household's needs, allowing you to enjoy cleaner air and a longer-lasting furnace.
If you're struggling to choose or replace a furnace filter for your home, Comfort Now is here to help. Our team serves homes throughout the Hanford, Visalia, Portersville, and beyond.
Boost your indoor air quality and preserve your home's comfort with a free system evaluation! Contact us to learn more.

Signs Your Air Ducts Need Repair: A Hanford, CA Homeowners Checklist
Around 90% of U.S. households use air conditioning. While an HVAC system can be a great asset in the winter and summer, it needs to be taken care of to do its job right.
If you have an air conditioning system, there may come a time when you need air duct repair. Damaged air ducts can lead to poor airflow and efficiency and need to be dealt with as soon as possible.
Fortunately, we're here to help. In this Hanford, CA checklist, we'll list the top signs that your air ducts need repair.
Loud Noises
Strange noises are a clear sign that something is wrong with your HVAC system. If you notice strange sounds, you'll want to get your system inspected by HVAC services in Hanford. You may need to make repairs to the air ducts to remedy the issue.
Common sounds that you may hear include bumping, clinking, and banging noises. Metallic sounds, big thumps, and grinding noises may indicate that certain parts in your system are bumping against one another and causing problems.
Bad Smells
In addition to strange noises, strange smells can be indicative of ductwork problems as well. The smell of mold or mildew should alert you that there's a problem that needs to be checked out by a professional.
Remember that mold issues can lead to health problems. If you have it in your ductwork, then it could cause you or your family to have difficulty breathing. This is particularly true if you have asthma or a similar condition.
In addition to mold and mildew smells, also pay attention if you notice any other odd smells as well. Take if you notice a burning smell or a sweet scent, which could be indicative of a refrigerant leak.
A Buildup of Dirt and Dust
A visible cue that your air ducts aren't working correctly is if there is a large amount of dust building up on your air vents. If you see noticeable dust around the vents, it could mean that your air filter isn't working as it should or that other issues need to be dealt with.
The buildup of dust and contaminants can lead to further damage to your HVAC system and could lead to high energy bills. It may be time to clean your air ducts or replace your air filter to eliminate the problem.
Increased Utility Costs
Many things can lead to your energy bills going up unexpectedly. One of the most common issues is if your ductwork is not working as it should. If airflow has been restricted or if there are leaks in the ductwork, then this could cause your HVAC system to work harder than previously to heat or cool your home adequately.
If there are problems, you're likely wasting money on your utility bills each month. Getting your system checked out is a great idea and can allow you to ensure your system is working as efficiently as possible.
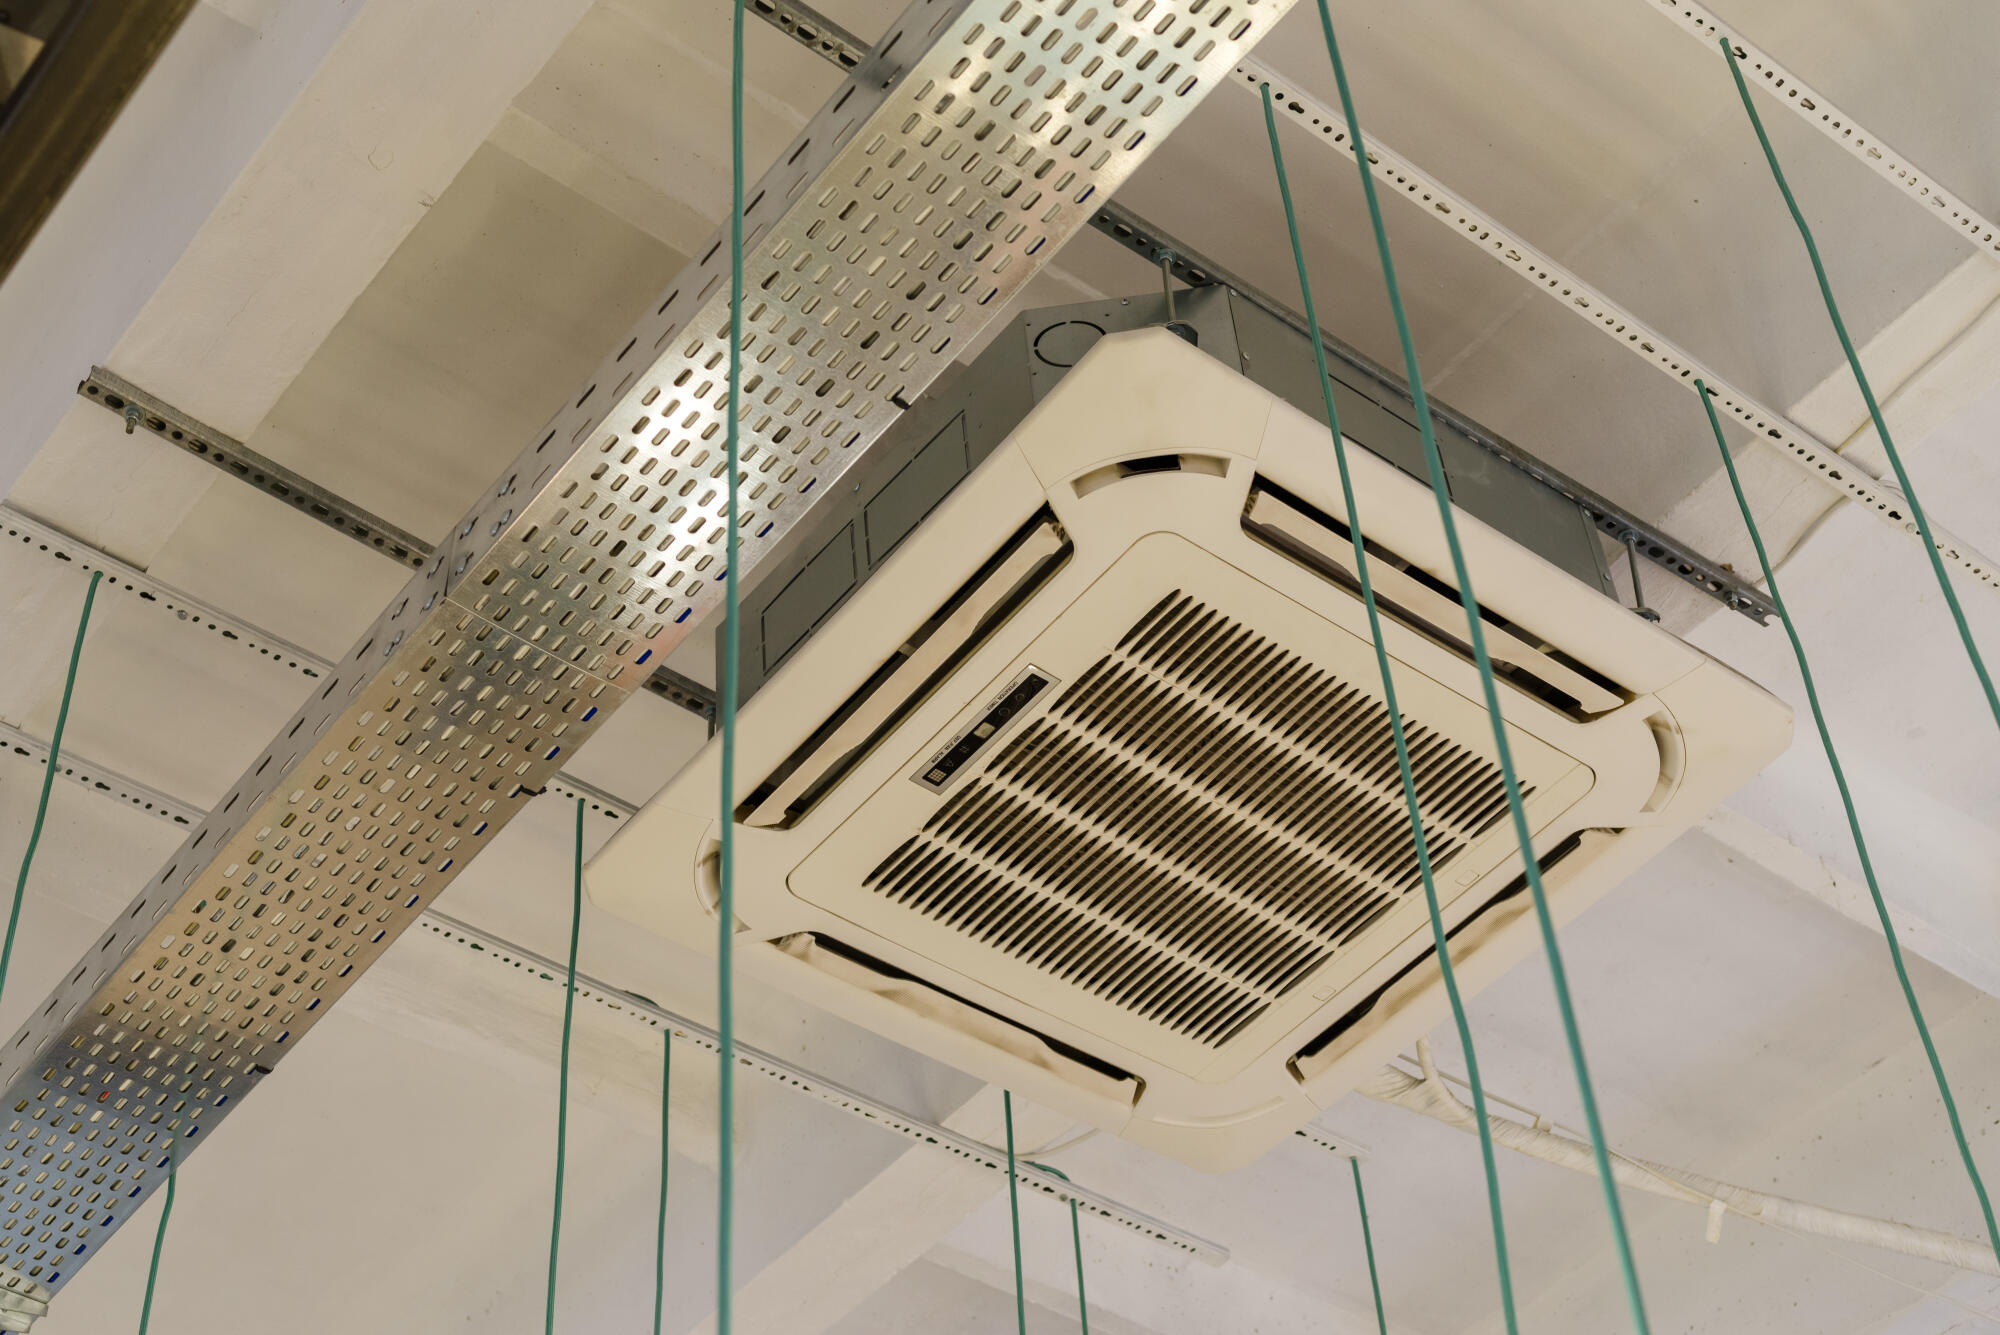
Inconsistent Temperatures
If there seem to be uneven temperatures throughout your home, it could be a sign that you need cooling and heating maintenance.
Take note if some areas of your home seem cold while others seem hot. Your HVAC system may not be distributing air correctly and there could be airflow restrictions that are causing problems. You'll want to hire a professional to look at your air ducts to get to the root of the issue.
Weak Airflow
If airflow seems particularly weak, then you may need to get your vents and air ducts checked out. Air should be coming out of your vents with some force, and if it's not, then it could mean that your ductworks are damaged in some way.
You may discover that there is a hole in your ductwork or that there are other issues that are leading to weak airflow. It's also possible that an air filter or vent is dirty and not working as it should.
If you notice weak airflow in your home, you'll want to get to the bottom of the problem. You may find that your air ducts need repair.
Pest Infestations
Another sign that you need air duct repair is if you notice pests in your home. Pests such as rats can end up chewing your ductwork and creating holes. Other types of pests can cause various types of damage as well.
It's also possible that pests will leave behind bacteria and droppings. These can cause health issues as they're pushed through the air vents in your home.
If you notice that you have a pest problem, you should have someone check out your HVAC system and air ducts to ensure that no damage has been done. In some cases, repairs will be needed.
High Humidity
Another sign that your air ducts need repair is if the humidity in your home has gone up. Your HVAC system should be working to eliminate some of the humidity in your home.
If it seems to be failing at this task, then it could be a sign that your HVAC system needs to be examined more closely. There could be a problem with your system air ducts or there could be another problem with the system such as with the evaporator coil.
Consider calling a professional to take a look at your system. They can help you get an idea of whether the functioning of your HVAC system is to blame for the increase in humidity.
Signs Your Air Ducts Need Repair
There are many signs that your air ducts need repair in Hanford. Whether you notice strange noises, strange smells, uneven temperatures, high energy bills, or another sign of trouble, be sure to call a professional to get your air ducts checked out.
With 9 years of operation and many 5-star reviews, Comfort Now is here for all of your HVAC needs. Our HVAC company offers excellent customer service and is knowledgeable about common HVAC issues.
Do your air ducts need repair in Hanford, CA? Contact us today to learn more about how we can help meet your needs.
Signs You Need Emergency Water Heater Repair in Visalia, CA
Picture this: you've had a long day, and there's nothing you're looking forward to more than the comfort of a hot shower or bath. Unfortunately, when you turn on the tap, you're greeted with something unexpected. Cold water, a nasty smell, or discolored water spills from the faucet instead of the clear hot water you were hoping for.
Out of sight is often out of mind where our water heater is concerned, but these devices often give us a few warning signs when they need help. Emergency water heater repair can help fix minor issues before they snowball into major headaches, so it's crucial to know what to look for. Here are a few red flags to be aware of with your water heater.
Leakage
A leaking water heater is the most obvious sign that emergency repair services should be in your future. Whether you've spotted water pooling beneath your system or a subtle drip, don't wait around! Investigating right away and contacting a pro where appropriate can help keep your system in good condition.
In some cases, leaks may happen due to a loose part you can tighten on your own. Condensation is another common culprit for false leaks, so wipe down the surface of your unit and see if the dripping stops.
If you can't locate or address the problem, find an expert to help right away. Even small leaks can cause substantial damage over time.
Fluctuating Temperatures
Your water heater has one job: delivering hot water to your home. If it's doing a shoddy job of it, you should always take it as a red flag. This is especially true if you can't get hot water even after you've adjusted the temperature on your unit, which should sit somewhere around 120 degrees Fahrenheit.
Worse, water fluctuations can be more than a minor annoyance.
Sometimes, these fluctuations happen when mineral deposits accumulate in your tank. These deposits can wreak havoc on your system in more ways than one, and they can even damage your unit's heating element. That's why it's crucial to contact an expert whenever you notice that your water is not getting hot.
Strange Noises
Your water heater likely makes a few quiet sounds during its usual operation as the tank fills and the heating element dials up. However, if you notice anything odd that breaks up the typical pattern of water heater noises you're familiar with, it should be cause for alarm.
In many cases, strange noises from a water heater come from mineral deposits as well. As these deposits grow in size, they sometimes break into smaller chunks when water flows through your tank.
During your system's operation, these chunks can float around in your system, battering themselves against the sides of your unit. As you can likely guess, this isn't great for the interior of your water heater!
Rusty or Discolored Water
When you notice cloudy or rusty water flowing from your taps, it can come as a huge shock. You might even notice tiny, dark particles in the water as well. If this discoloration only happens when you're turning on the hot water but never cold, the problem most likely lies with your water heater.
Discoloration can happen for a few reasons. Sometimes, certain types of mineral deposits can cause discoloration in your system. If the water appears rusty, the pipes or other metal components of your system may be damaged.
This water may not be safe to drink, though it is unlikely to be otherwise hazardous to your health. Contact emergency repair services right away to figure out what's going on with your system.
Unpleasant Smells
The water flowing from your system should always be odorless. If you notice a strange smell, sometimes paired with cloudy water, you might be dealing with a bacterial infection somewhere in your system. The most common unwanted smell from water heater tanks is similar to a rotten egg, as sulfate bacteria are the most likely type to develop within a tank.
Sometimes, the easiest way to fix the issue is flushing your tank, a basic maintenance task you should tackle at least once a year. However, if this doesn't get rid of the smell, avoid using your water and call a technician. A repair expert can disinfect and clean the tank, giving you access to clean water again.
Low Water Pressure
Weak pressure from your water heater is never a good sign. If the water pressure seems fine for your cold water but not the hot water, your unit may be struggling to keep up with your needs.
This can sometimes happen when mineral deposits settle and calcify around the heating element in your system. In other cases, a faulty distribution line or shoddy installation may be to blame. Getting a water heater repair expert on the scene can help you troubleshoot the problem and get a steadier amount of pressure from your hot water taps.
Little Hot Water
If your household never seems to get as much hot water as it used to, something is likely wrong with your tank. As long as your system is appropriately sized for your home and the temperature settings are correct, you shouldn't run out of hot water from reasonable use.
Often, the problem lies with a malfunctioning heating element or burner. This can sometimes require a repair or a full water heater replacement, so work with your emergency repair technician to decide what your next steps should be.
Get Emergency Water Heater Repair Now
Whether you're dealing with weird sounds, struggling with your water pressure and temperature, or cringing at unpleasant smells, you don't have to suffer through hot water issues alone. Diagnosing and fixing the problem can be difficult without the right expertise, so contact a pro for immediate help.
When you're searching for trusted local experts for your emergency water heater repair, look no further than Comfort Now Heating and Air Conditioning! We're proud to serve homeowners throughout the Visalia area and offer 100% satisfaction guarantees on our workmanship. Contact us today to schedule your free plumbing inspection.
4 Warning Signs There May Be a Gas Leak in Your Porterville, CA Home
Have you ever walked into your home and felt that something just wasn't right? That unsettling feeling could be a silent alarm for a potential danger lurking within the walls of your home: a gas leak. Gas leak detection companies play a crucial role in safeguarding households, but the first line of defense always starts with you.
Understanding the signs of a gas leak is not just about safety. It's about preserving the sanctuary that is your home. Think of your family, the gatherings in the living room, the laughter in the kitchen; all these cherished moments hinge on the security and safety of your environment.
Let's explore how you can detect the silent threats and take proactive steps to protect what matters most.
1. Unusual Smells
When it comes to a gas leak in your home, your nose might be your best detective. One of the most telltale signs is an unusual smell, something out of the ordinary that grabs your attention.
Natural gas is inherently odorless, but gas companies add a distinctive odor, similar to rotten eggs, to alert you in case of a leak. This safety measure can be a lifesaver.
Imagine walking into your kitchen and catching a whiff of this strong, sulfur-like odor. It's not something to ignore. This smell is an immediate red flag that indicates the potential presence of a gas leak.
Studies have shown that the human nose is quite sensitive to this additive which means even a small leak can be detected early. Homeowners should be vigilant, especially in older homes where gas lines may be more prone to wear and tear.
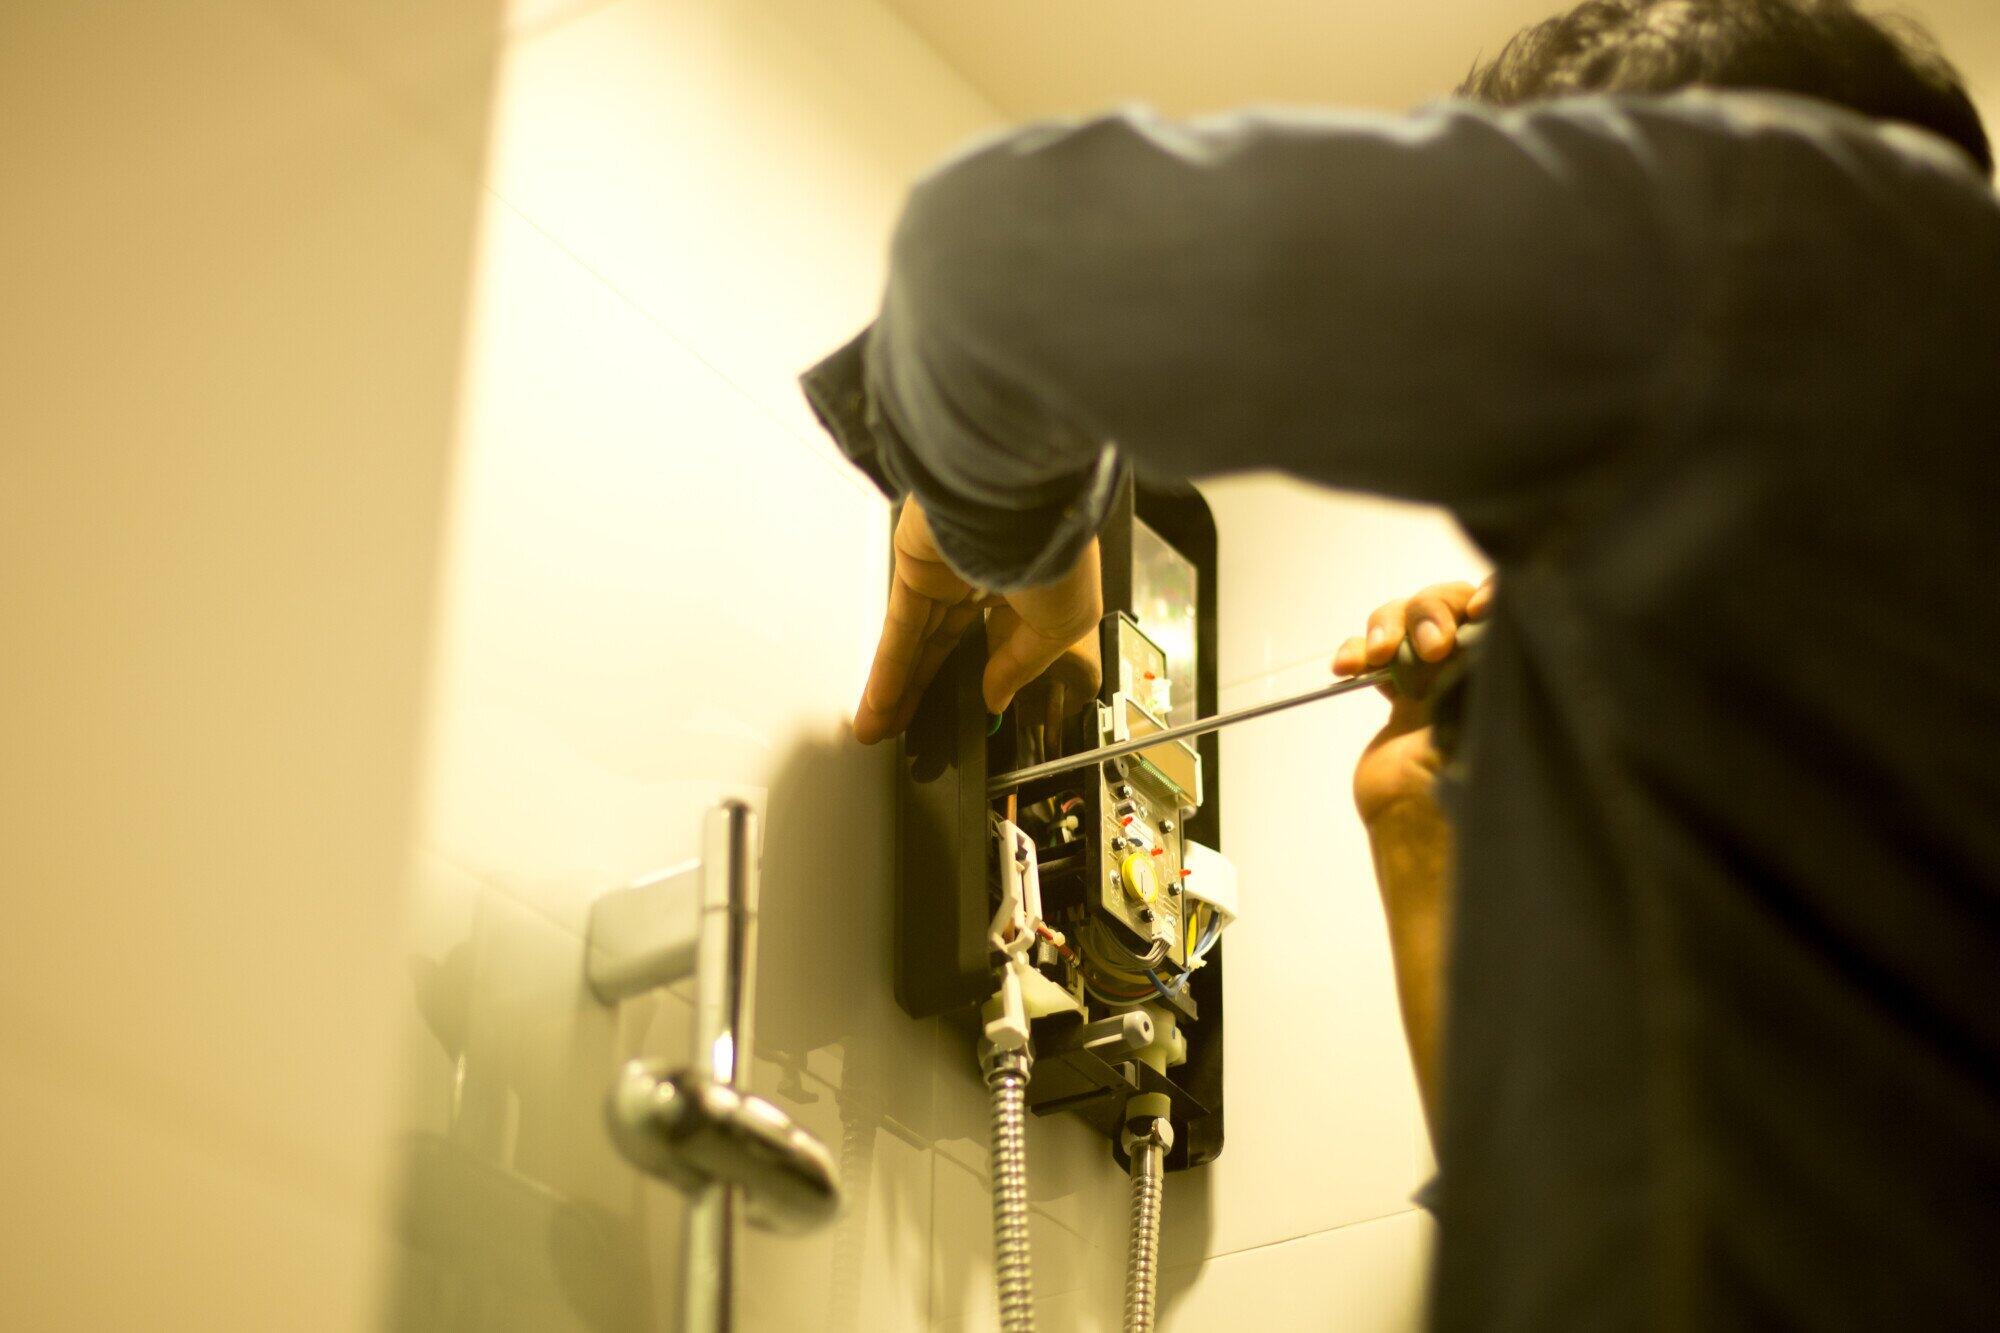
2. Hissing Sounds
Another key indicator of a gas leak is sound. Specifically, a hissing or whistling noise coming from your gas lines or appliances. This sound can be subtle, but it's a clear signal that gas is escaping from its intended path.
Often, this sound can be heard near gas appliances like stoves or heaters, or where the gas pipes enter your home.
This hissing noise is caused by the pressure of the gas escaping through a small opening or crack in the pipes or appliances. It's like the sound you hear when air escapes from a balloon, but in this case, it's gas, and the implications are far more serious.
Detecting a gas leak through sound requires a quiet environment. If you hear a hissing noise near any gas-powered appliance or suspect a leak, it's important to act quickly.
Don't try to fix it yourself, as this could be dangerous. Instead, turn off the gas supply if possible and call a professional. Remember, detecting a gas leak promptly can prevent a small issue from turning into a dangerous situation.
3. Physical Symptoms
When natural gas, especially carbon monoxide, leaks into your living space, it can cause a range of physical symptoms in those exposed. Recognizing these symptoms early can be a lifesaver.
One of the most immediate and noticeable symptoms is a persistent headache. Unlike normal headaches, these often worsen when you're at home and improve when you leave, signaling that something in the home environment is the cause.
Dizziness and nausea are other common symptoms, which, while easily dismissed as signs of fatigue or a minor illness, may indicate prolonged exposure to gas.
Fatigue or a general feeling of tiredness, particularly after spending time near gas appliances, should also raise alarms. This fatigue often feels different from regular tiredness; it can be overwhelming and unexplained.
Exposure to low levels of natural gas can result in flu-like symptoms, including body aches and a feeling of lethargy, which might not immediately connect to a gas leak in your mind.
More severe symptoms include difficulty breathing or chest tightness, which are particularly alarming signs. These symptoms indicate that the gas concentration in the air might be reaching dangerous levels. In extreme cases, prolonged exposure can lead to unconsciousness or worse, so taking these symptoms seriously is crucial.
Children, elderly individuals, and pets may show symptoms first or more severely, given their sensitivity to environmental changes. In homes with infants, unexplained irritability or drowsiness could be a clue.
Pets might seem lethargic or have difficulty breathing. Keeping an eye on these vulnerable family members can provide early warning signs.
It's important to note that these symptoms can have other causes, but if they appear in conjunction with other signs of a gas leak, it's best to err on the side of caution.
The U.S. Environmental Protection Agency (EPA) emphasizes the importance of installing carbon monoxide detectors in homes as a precautionary measure. These detectors can provide an early warning before physical symptoms become apparent.
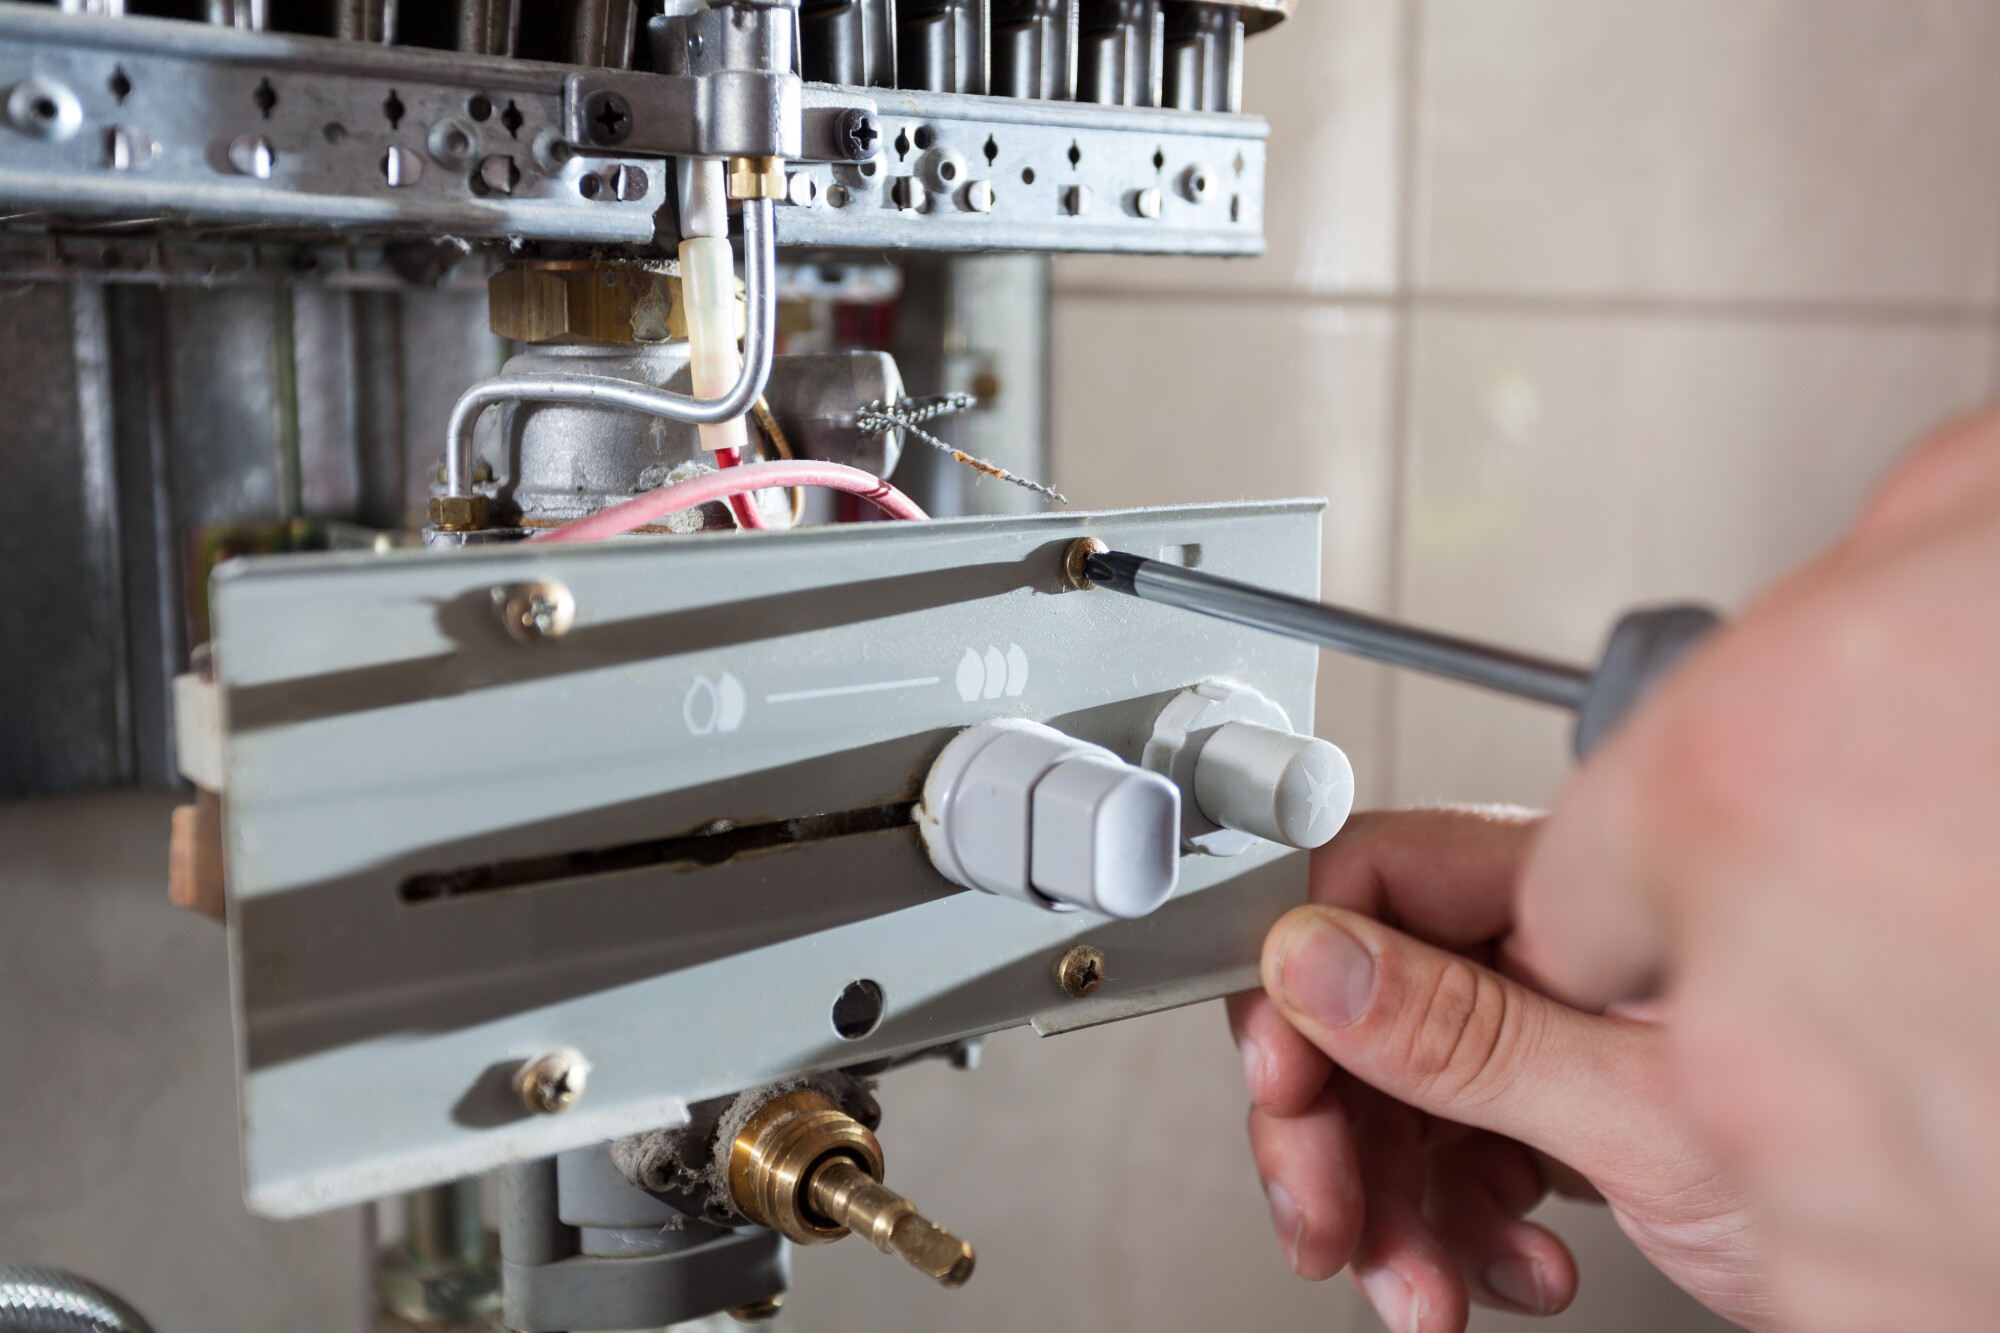
4. Visible Signs on Appliances
Visible signs on your appliances can be key indicators in fixing a gas leak. One of the most evident signs is a blue flame turning orange or yellow on a gas stove.
Gas appliances are designed to burn gas completely, producing a blue flame. An orange or yellow flame suggests incomplete combustion, potentially signaling a gas leak.
Moreover, soot or black marks around appliances are clear warnings. These marks often appear on the outside of a gas stove, heater, or boiler. They are caused by the incomplete burning of gas which indicates that the appliance is not functioning properly.
Another visible sign to watch out for is excessive condensation on windows or walls near the appliance, more than what's typical in a normal household environment.
It's also vital to inspect the external components of your gas appliances. Look for signs of damage or wear and tear on gas hoses and connections. Cracks, holes, or loose fittings can be the primary causes of gas leaks.
Secure Your Sanctuary
In Porterville, the safety of your home hinges on recognizing gas leak signs, and here's where gas leak detection companies like Comfort Now step in. We bring expertise and diligence to every inspection to ensure your home remains a safe haven.
Our team is equipped to handle the nuances of detecting and fixing gas leaks, offering peace of mind and protection. If you suspect a gas leak, don't hesitate. Reach out to Comfort Now for thorough and reliable detection services. Together, let's keep your home secure and your loved ones safe.
How to Know You Need Heating Repair in Visalia, CA
California is known for having a fairly warm climate, but you'll still want to be prepared for those colder winter months. A home heating system will ensure you and your family are comfortable when the temperatures drop, but only if it's working correctly.
Even a well-maintained heating system will experience issues. Wear and tear take a toll and parts fail. There will be times when you need the services of a professional heating repair company, but how do you know when this is?
In this guide, we'll cover some of the tell-tale signs that you need heating maintenance in Visalia, CA. Keep reading for more.
Unusual Noises
Most heating systems make some noise when they're functioning properly, but you'll quickly get used to these. At some point, however, you may start to notice different noises, and this could be a bad sign.
Banging, clanking, or screeching noises might happen if there's something wrong with your system. Various parts can cause this, and it may be tricky to know exactly what's wrong.
A professional heating maintenance technician should be able to identify the problem and deal with it. In most cases, you won't experience a complete failure as long as you deal with the issue quickly.
Bad Smells
You may notice a slight smell when you first turn on your furnace. This is probably just dust burning off the ducts and it's nothing to worry about as it should fade within a few hours.
If there's a smell that doesn't go away, however, then there might be another issue. For example, there could be a broken mechanical part that gives off a smell similar to burning rubber or plastic.
Sometimes a smell can come from dirt and debris getting caught in the filter. Changing the air filter may eliminate the smell, so try this first.
If a smell persists, don't ignore it. This is a clear sign that something is't right. Contact a professional as soon as you can to take a look at your system.
Uneven Heating
A working furnace should be able to heat your home evenly. If there are cold spots in your home, then there's likely an issue.
You may move from one room to another and notice a sizable temperature change. There are several issues that can cause this.
The first is a faulty thermostat. You may need to adjust the settings or replace it with a new one. Fortunately, you can do this without replacing the entire system so it's a fairly simple repair job.
A clogged filter may also cause uneven heating, so replacing this could be the solution. You can do this yourself and it won't cost too much.
If neither of these work then there's likely a larger issue such as a damaged heating element. You'll want to contact professional heating services to investigate and find out what the problem is.
Unusually High Energy Bills
During the winter, it's normal to experience higher bills due to increased energy use. Heating bills always seem to be on the rise too, so your bills this year may be slightly higher than they were last year.
With that in mind, there shouldn't be a huge increase. If you notice a sudden spike in your utility bills, a faulty furnace could be the reason.
In many cases, a furnace that isn't functioning properly will become noticeably less efficient. It will need to use more energy to heat your home. As a result, your energy bills will go up quite a lot even if you aren't increasing your usage.
You should contact a heating repair company as soon as you can. The longer you leave it without doing anything, the more you'll spend on these excessive bills.
Reduced Air Quality
This isn't something you can see, so it may be difficult to detect, but you can still notice it. Some heating system issues can cause the air in a home to get stuffy or hazy, making it less comfortable.
A flawed furnace could circulate contaminants like allergens, dust, and mildew spores. These can present a health risk, and you and your family might experience respiratory issues as a result.
Changing the filter is a good idea when this happens. It can cause such issues if it's damaged or clogged. You should regularly check your filter to avoid this.
The problem could be more than just the filter, however. In this case, a professional will be able to examine your system and diagnose the issue. This is something you want to deal with immediately as it can negatively impact the health of your family.
Frequent Repairs
As a furnace gets older, parts will fail more frequently and it will experience more issues. It may get to a point where repairs are needed very often, and this will be costing you a lot of money.
A new furnace will experience far fewer issues. While there will be an initial investment, it may be well worth it.
The money you're spending on repairs could be excessive, and it will be struggling to keep up with your needs. On top of being more reliable, a new heating system will be more efficient, so you'll also start saving money on your energy bills.
You Have to Constantly Adjust Your Thermostat
When you set your thermostat, your heating system should keep your home at a stable temperature. It might struggle to do this if there's something wrong.
You may find that you have to keep adjusting the thermostat to keep your home comfortable. This is a sign that there's something wrong, but it can be difficult to know what. Contact a professional so they can investigate and figure out the issue.
Professional Heating Repair in Visalia, CA
If your heating system is doing anything it shouldn't or isn't functioning properly, you'll need to have a professional take a look. A qualified heating repair company will be able to tell you what the issue is and suggest the best fix.
Comfort Now is a professional air, plumbing, and heating company in Visalia, CA. We provide Visalia heating services and offer a 12-month no-breakdown guarantee. Check out our heating services page to find out more about how we can help.